

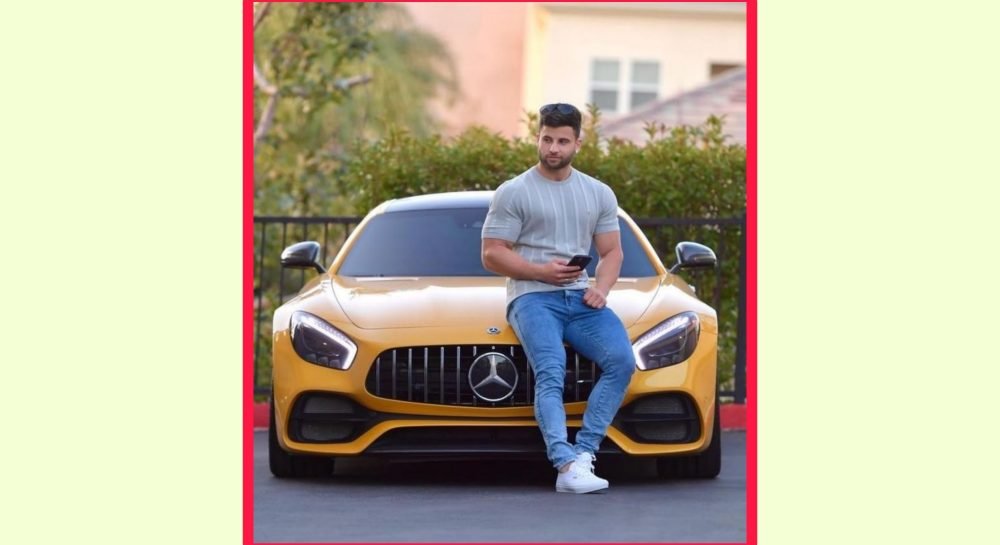
How to Composite a Car Into Your Photos: A Practical Editing Guide
There’s a specific look you’ll notice across a lot of polished automotive-style content, a person standing beside or in front of a car that clearly wasn’t actually there when the photo was taken, blended in convincingly enough that most viewers scrolling past wouldn’t think twice. This isn’t the AI face-generation trend where an app builds an entirely new image from scratch, it’s a more hands-on compositing technique: taking a real photo of yourself, replacing or enhancing the background, and blending in a car image so it looks like it belongs in the shot.
It takes a bit more effort than a one-tap AI filter, but it also gives you far more control over the final result, and it’s a genuinely useful skill if you’re doing any kind of content around automotive brands, dealerships, or personal branding that leans into a premium aesthetic.
The Basic Idea Behind This Technique
Rather than generating an entirely new AI image, this approach works by layering: you start with a real photo of yourself, then add a car image (either a transparent PNG of a car or a car cut out from another photo) positioned behind or beside you, then blend the whole composition together with matching lighting, shadows, and color grading so the different source images look like they were shot together in one take.
The realism comes almost entirely from getting the details right in the blending stage, not from the car image itself. A high-quality car photo dropped into a mismatched scene with the wrong lighting direction or shadow angle looks obviously fake within a second of looking at it.
Apps That Handle This Well
PicsArt
PicsArt has long been one of the most capable mobile apps for this kind of layered compositing, with background removal tools, a large library of PNG cutout objects (including cars), and blending controls that let you adjust opacity, shadow, and color matching between layers. It’s a solid starting point if you want to do this entirely on your phone without needing desktop software.
Adobe Photoshop Express / Photoshop (Desktop)
For more precise control, particularly around shadow placement and color grading, full Photoshop remains the most capable tool, though it has a steeper learning curve than mobile-first apps. Photoshop Express on mobile offers a lighter version of similar tools if you don’t need the full desktop suite.
Background Eraser / Remove Background apps
Several dedicated apps focus purely on the background removal step, cleanly cutting out a subject or object from its original background so it can be layered into a new scene. Useful specifically for prepping a car cutout from a source photo before bringing it into your main editing app.
CapCut (for video versions)
If you’re doing this as a short-form video rather than a static photo, CapCut’s layering and masking tools support similar compositing, letting you place a car element into a video scene with basic tracking so it stays positioned correctly as the camera or subject moves.
The Actual Process, Step by Step
- Start with a well-lit source photo of yourself. Natural daylight, taken from an angle and distance that matches roughly how you want the final composite to look, gives you the most to work with. A photo taken in flat, harsh lighting is harder to blend convincingly with a car image shot under different lighting conditions.
- Find or prepare a car image with a transparent background. Many editing apps include built-in PNG libraries with cars already cut out. If you’re using a photo of a specific car, you’ll need to remove its background first using a background eraser tool.
- Position the car layer, paying attention to perspective. The car needs to sit at a scale and angle consistent with where a real car would appear relative to you in that space, not just dropped in at any arbitrary size. Get this wrong and the whole composite falls apart no matter how good the individual pieces look.
- Match the lighting direction. Look at where shadows fall in your original photo, and check that the car’s shadows and highlights are coming from the same direction. This is one of the most common mistakes in amateur composites, a subject lit from the left standing beside a car clearly lit from the right.
- Add a matching shadow beneath the car. A car sitting on ground without any shadow reads as obviously fake almost instantly. Most editing apps let you paint in a soft shadow manually beneath the added object.
- Apply consistent color grading across the whole image. This is the step that ties everything together. Apply the same color filter, contrast adjustment, and warmth/coolness across both the original photo and the added car so they look like they were captured with the same camera settings, rather than two visibly different images pasted together.
- Fine-tune edges. Zoom in on where the car meets its surroundings and clean up any obvious cutout edges, a slightly visible outline around the car is one of the fastest ways to break the illusion.
Common Mistakes That Give Away an Edited Photo
Mismatched lighting direction — the single most common giveaway, and the easiest thing to check before finalizing anything.
Wrong scale or perspective — a car that’s slightly too large or small relative to the subject, or positioned at an angle inconsistent with the camera’s viewpoint, looks subtly wrong even to people who can’t immediately articulate why.
No shadow, or a shadow that doesn’t match the ground surface — flat, hard shadows on what’s supposed to be grass, or vice versa, break the realism.
Over-sharpened or under-sharpened edges — the added element should match the sharpness level of the rest of the photo. A crisply sharp car cutout against a slightly soft background photo (or the reverse) creates a subtle but noticeable mismatch.
Ignoring reflections — if the setting includes wet ground, glass, or other reflective surfaces, a car with no corresponding reflection looks obviously inserted.
When to Use This vs. AI Generation Tools
This layering approach gives you more precise control and tends to hold up better under close scrutiny when done carefully, since you’re working with real source images rather than an AI reconstructing a scene from scratch. It’s a better fit if you have a specific car, angle, or composition in mind and want exact control over every element.
AI generation tools (the kind that build an entire scene from a text prompt and a reference photo) are faster and require far less editing skill, but you get less control over the specific details and sometimes end up regenerating multiple times to get hands, reflections, or proportions looking right.
If you’re going for a quick, one-off result, AI generation is the faster route. If you’re building a consistent brand aesthetic and want full control over every detail, learning this manual compositing approach is worth the extra time investment.
A Practical Note
This technique rewards patience more than raw editing skill. The difference between a composite that looks obviously fake and one that fools most viewers usually comes down to the small details, shadow direction, color consistency, edge cleanup, rather than anything complicated.
Start with a simple composition, get the lighting and shadow matching right before worrying about anything else, and build up to more elaborate scenes once the basics are consistently convincing.
